Tuesday, December 15, 2009

Visual Inspiration

As a visual artist A.K.A. photographer I often look to other photographers for inspiration that I can use to push the envelope and develop my skills and creativity to produce better works. I wanted to share some of my favorite artists with you.
Sianp
Location Unknown
Rarindra Prakarsa
Jakarta, Indonesia
What inspires me about this image is the use of back lighting of the
subjects which almost throughs the cat into a silouette. I can't say for certain
but I'm sure there is a good deal of Photoshop work (dodging and burning) that
was performed on the image to create this result.


What inspires me about this image is the use of contrast and saturation to gove
the image a surreal quality that you can't find in a lifelike image.

Sunday, December 13, 2009

Flash Your Christmas Tree

Today the wife and I gathered our three children to take our annual Christmas portrait in front of our Christmas tree. The room lighting was not very good so I setup two off camera slave flashes (580 EX II and 430 EX) on light stands and triggered them using the Canon 7D's built-in master flash. I love this feature on the 7D!

I wanted to capture the available light of the Christmas tree but after a few test shots with the children I knew I would have to go with a faster shutter speed to minimized motion blur because our youngest would not or could not stand still. This resulted in a 1/60 second shutter speed with an aperture of 4.5. to get a shallow depth of field. I setup the camera to manual mode (M) and took a few test shots to dial in the flash to get a decent exposure.

We took several images with all five us but I was not very happy with any of them because the lights on the Christmas tree just didn't show up at all. The children were becoming restless so I made the decision that what we had taken was going to have to do.

After the boys were off in their rooms playing my wife and I continued the photo session with a few images of both of us. Me being somewhat lazy on that Sunday afternoon I left the camera on the same settings as before and again I wasn't happy with the results.

What to do? I decided to slow the shutter shutter speed by a stop or two while leaving the aperture at 4.5 and I also lowered the flash output by 1 stop. Wow, what a difference it made. Now this is what I had in mind when we started.

Next year our youngest will be a little bit older and hopefully a little more able or willing to stand still so I can use the slower shutter speed and get those Christmas tree lights to really glow in our family Christmas portrait.


All images copyright Daniel Ray Photography.

Wednesday, November 25, 2009

Photography Quotes

Some of my favorite photography quotes...
  • "There are always two people in every picture: the photographer and the viewer." ~Ansel Adams

  • "You don't take a photograph, you make it." ~Ansel Adams

  • “Photography takes an instant out of time, altering life by holding it still.” ~Dorothea Lange

  • "It's weird that photographers spend years or even a whole lifetime, trying to capture moments that added together, don't even amount to a couple of hours." ~James Lalropui Keivom

  • “Whether he is an artist or not, the photographer is a joyous sensualist, for the simple reason that the eye traffics in feelings, not in thoughts.” ~Walker Evans
All images copyright Daniel Ray Photography.

Friday, October 16, 2009

Details of a Ferrari

There is nothing like an exotic Italian sports car. Most of us have seen them speed by at 100+ MPH and leave you in their dust. In this series I chose not to photograph the entire car, but rather focus on some of the finer details that you can't see when they pass you in a blurrrrr..

Front hood
Wheel, tire and disc brake
Drivers side front panel and door
Tail with see through engine cover.
Right rear corner
Dashboard
Exhaust

All images copyright Daniel Ray Photography.

Friday, October 09, 2009

Photoshop Tip - Merge All Visible Layers

Like most other digital photographers I occasionally use Adobe Photoshop (PS) to edit and enhance my images. I'm always looking for better or faster ways of doing things in PS so as I run across great PS tips I will be sharing them with you guys. So without any further delay here is PS tip #1.

When editing my images in PS I typically create mutliple adjustment layers. As you can see in the image below I have the original (background) image layer, a levels adjustment layer and a curvers adjustment layer.


When I finished making adjustments to the image I almost always need to sharpen the entire image using either one of the sharpening filters or by using the High Pass filter (Filter > Other > High Pass...) which is my favorite. In order to apply the sharpening filter to the original image plus all the adjustments the multiple layers must be combined into one layer. This is done my pressing CTRL+ALT+SHIFT+E which will create a new top level layer that is a merge of all visible layers.

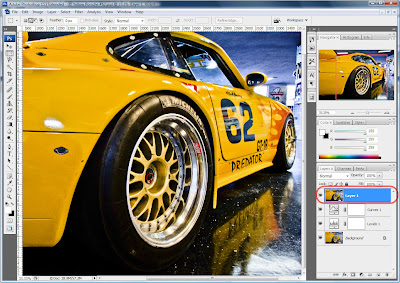
Now you can select the new layer and apply your favorite sharpening filter to the entire image.


All images copyright Daniel Ray Photography.