Front hood
Friday, October 16, 2009
Details of a Ferrari
There is nothing like an exotic Italian sports car. Most of us have seen them speed by at 100+ MPH and leave you in their dust. In this series I chose not to photograph the entire car, but rather focus on some of the finer details that you can't see when they pass you in a blurrrrr..
Friday, October 09, 2009
Photoshop Tip - Merge All Visible Layers
Like most other digital photographers I occasionally use Adobe Photoshop (PS) to edit and enhance my images. I'm always looking for better or faster ways of doing things in PS so as I run across great PS tips I will be sharing them with you guys. So without any further delay here is PS tip #1.
When editing my images in PS I typically create mutliple adjustment layers. As you can see in the image below I have the original (background) image layer, a levels adjustment layer and a curvers adjustment layer.

When I finished making adjustments to the image I almost always need to sharpen the entire image using either one of the sharpening filters or by using the High Pass filter (Filter > Other > High Pass...) which is my favorite. In order to apply the sharpening filter to the original image plus all the adjustments the multiple layers must be combined into one layer. This is done my pressing CTRL+ALT+SHIFT+E which will create a new top level layer that is a merge of all visible layers.
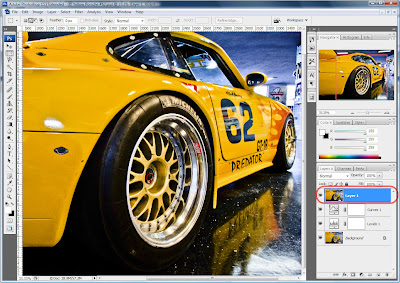
Now you can select the new layer and apply your favorite sharpening filter to the entire image.
When editing my images in PS I typically create mutliple adjustment layers. As you can see in the image below I have the original (background) image layer, a levels adjustment layer and a curvers adjustment layer.

When I finished making adjustments to the image I almost always need to sharpen the entire image using either one of the sharpening filters or by using the High Pass filter (Filter > Other > High Pass...) which is my favorite. In order to apply the sharpening filter to the original image plus all the adjustments the multiple layers must be combined into one layer. This is done my pressing CTRL+ALT+SHIFT+E which will create a new top level layer that is a merge of all visible layers.

Monday, September 14, 2009
Glamour-ish
This past Saturday I asked my wife to model for me so I could practice portrait lighting and posing. I know very little about how to properly pose or light a person for a portrait, but from reading online forums, books and studying other photographer's portrait work I've picked up a few tips for posing and lighting. I wasn't trying to create "glamour" style images but they seem to have come out that way.
Our kitchen and breakfast area has excellent defused northern light streaming in through the two large windows so I decided to use that room for this shoot. We moved the breakfast table and chairs out of the room and I tacked a large 6' x 14' piece of black felt cloth about 4 feet up on the wall to act as the backdrop. The cloth hung down the wall with enough material leftover so that I could pulled in away from the wall to cover the floor. This allowed me to have the same color on the floor and the wall behind her. The use of a solid color backdrop allows the viewer of the image to focus on what's important, the person and not become distracted by the background.
The lighting for all of these images was natural sunlight coming in from two windows located to the right of the camera. I also used a 24 inch round silver reflector that was used to reflect the sunlight on to the side of her face opposite the windows. The reflected light reduces the shadows and provides even lighting across her face which helps smooth the look of the skin.
If there is something I learned from this session it is that I want to have more energy in my portrait images. These are a little to "posed" for my liking so next time I'm going to use a fan and see if we can get her hair moving in the wind or something like that to give them more life. We are both very happy with the results and we're planning on doing more of this style later.
Our kitchen and breakfast area has excellent defused northern light streaming in through the two large windows so I decided to use that room for this shoot. We moved the breakfast table and chairs out of the room and I tacked a large 6' x 14' piece of black felt cloth about 4 feet up on the wall to act as the backdrop. The cloth hung down the wall with enough material leftover so that I could pulled in away from the wall to cover the floor. This allowed me to have the same color on the floor and the wall behind her. The use of a solid color backdrop allows the viewer of the image to focus on what's important, the person and not become distracted by the background.
The lighting for all of these images was natural sunlight coming in from two windows located to the right of the camera. I also used a 24 inch round silver reflector that was used to reflect the sunlight on to the side of her face opposite the windows. The reflected light reduces the shadows and provides even lighting across her face which helps smooth the look of the skin.
1. I like this image with the exception that you can not see her hair very well. I also don't like the way her legs are crossed, but I'm not sure how else I would have had her arranged them.
2. This was my favorite image from the day. I like the crossed legs, the color of her hair and the lighting on her face. If I had to change anything I'd have her move her legs so they are more straight up and down like in the image below this one.
3. This one is similar to the above but the crossed legs are more straight up and down which I like better. She thinks there is too much symmetry in the face, hands and hair.
4. This one was all her, she started moving her hand through her hair and I grabbed this shot. The lighting across her face and the focus is off a tad bit but I like the feel of movement in this image.
If there is something I learned from this session it is that I want to have more energy in my portrait images. These are a little to "posed" for my liking so next time I'm going to use a fan and see if we can get her hair moving in the wind or something like that to give them more life. We are both very happy with the results and we're planning on doing more of this style later.
Saturday, September 12, 2009
A Rainy Saturday
This has been a very dry summer in Texas but this past week has been very wet and today (Saturday) it rained almost all day long. Our three boys were content to stay in their rooms and play video games most of the day and there wasn't much on TV so I decided to experiment with portrait lighting and try out an idea I had for a portrait of my wife. As usual, she was more than happy to be my photography muse for the day.
The portrait idea I had was to use the french doors that lead from our living room out to the back patio as a prop for a portrait. I wanted to create a evening or night feel with my wife in a cocktail dress and use the window panes of the french door to break up the image. Even with the rainy overcast sky there was no way I could shoot from the darker inside of the house, through the french doors to the bright outside without turning my wife into a silhouette. The solution was to hang a 6'x6' peice of black felt cloth from the roof of the patio as a back drop and block the harsh outside light, the patio furniture and the boys go-kart, bikes and toys on the patio. I then placed a lightstand outside to the left of the door with a speedlite and reflective umbrella to illuminate her.

I like the results...

This one was taken in the same place but with the french doors open.
All images copyright Daniel Ray Photography
Tuesday, August 04, 2009
Mountain Sunset
We just returned from our summer vacation to the Ozark mountains in Arkansas. What a wonderful time we had. This was the first time my three boys and my wife have been to Arkansas, so they were in awe of the mountains and the views of the valleys. The weather was so much cooler than we are normally accustomed to in Houston, Texas and the scenery was absolutely beautiful. I vacationed in the same place several times as a child and it was very interesting to return to these same places as an adult. We stayed in a log cabin on the top of Mount Nebo and drove to several other mountain state parks during a week long stay.
Since I first purchased my Canon 40D DSLR camera back in November of 2007 I've been waiting for a change to capture a mountain sunset. Well, I got my change on this trip. In fact I went a little overboard with the number of sunset images I captured. But then again its digital and doesn't cost anything except a little disk space.
Most of the sunset images I took were processed as High Dynamic Range (HDR) images which allow you a display a much broader range of colors and tones than can be captured in a single photographic image.
Taken from on top of the The Hot Springs Tower in Hot Springs National Park

Mount Nebo Sunset Point
Subscribe to:
Posts (Atom)